Thursday, September 25, 2014

Bears Like Marmalade

Anyone else remember that adorable bear, Paddington, that loved marmalade? Well, if you don't, you should go look him up and read at least a couple of the books about his adventures.

Freezer Marmalade


Ingredients 

3 large oranges
1 large lemon
1/2 c water
1 package sure-jell pectin
3/4 c water
4 1/4 c sugar

Instructions 

Using a large cheese grater, grate off peel of oranges and lemon. Cutting off all pith (and other bad places) chop up orange and lemon innards. Add zest and innards to stock pot with 1/2 c water. Bring to boil for about 15 min. Mix pectin with 3/4 c water then add to boiling fruit mixture. Bring everything to a boil and stir constantly for about 5 min (until peel begins to look tender). Turn off heat and add sugar making sure it is well mixed in (no lumps!). Ladle hot marmalade into clean containers. Let sit for 24 hours to cool. After 24 hours, put containers in freezer (for 1 year) or fridge (3 weeks).

Recipe adapted from: http://www.kraftrecipes.com/recipes/30-minutes-homemade-surejell-orange-freezer-marmalade-52029.aspx

Wednesday, September 17, 2014

The Taste of Summer Sunshine

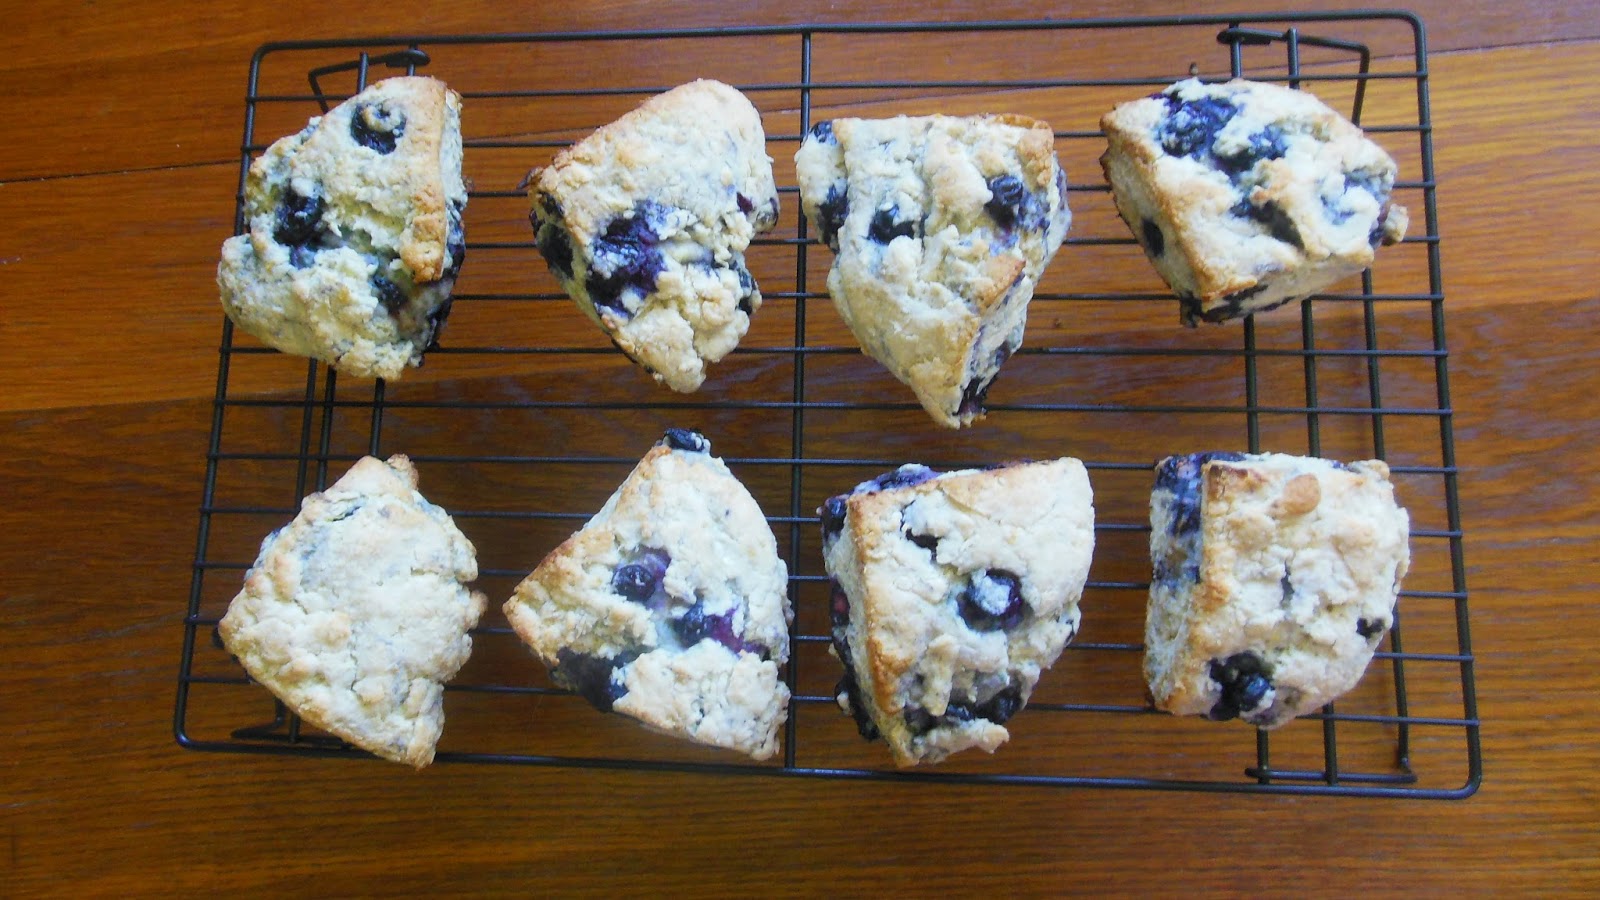
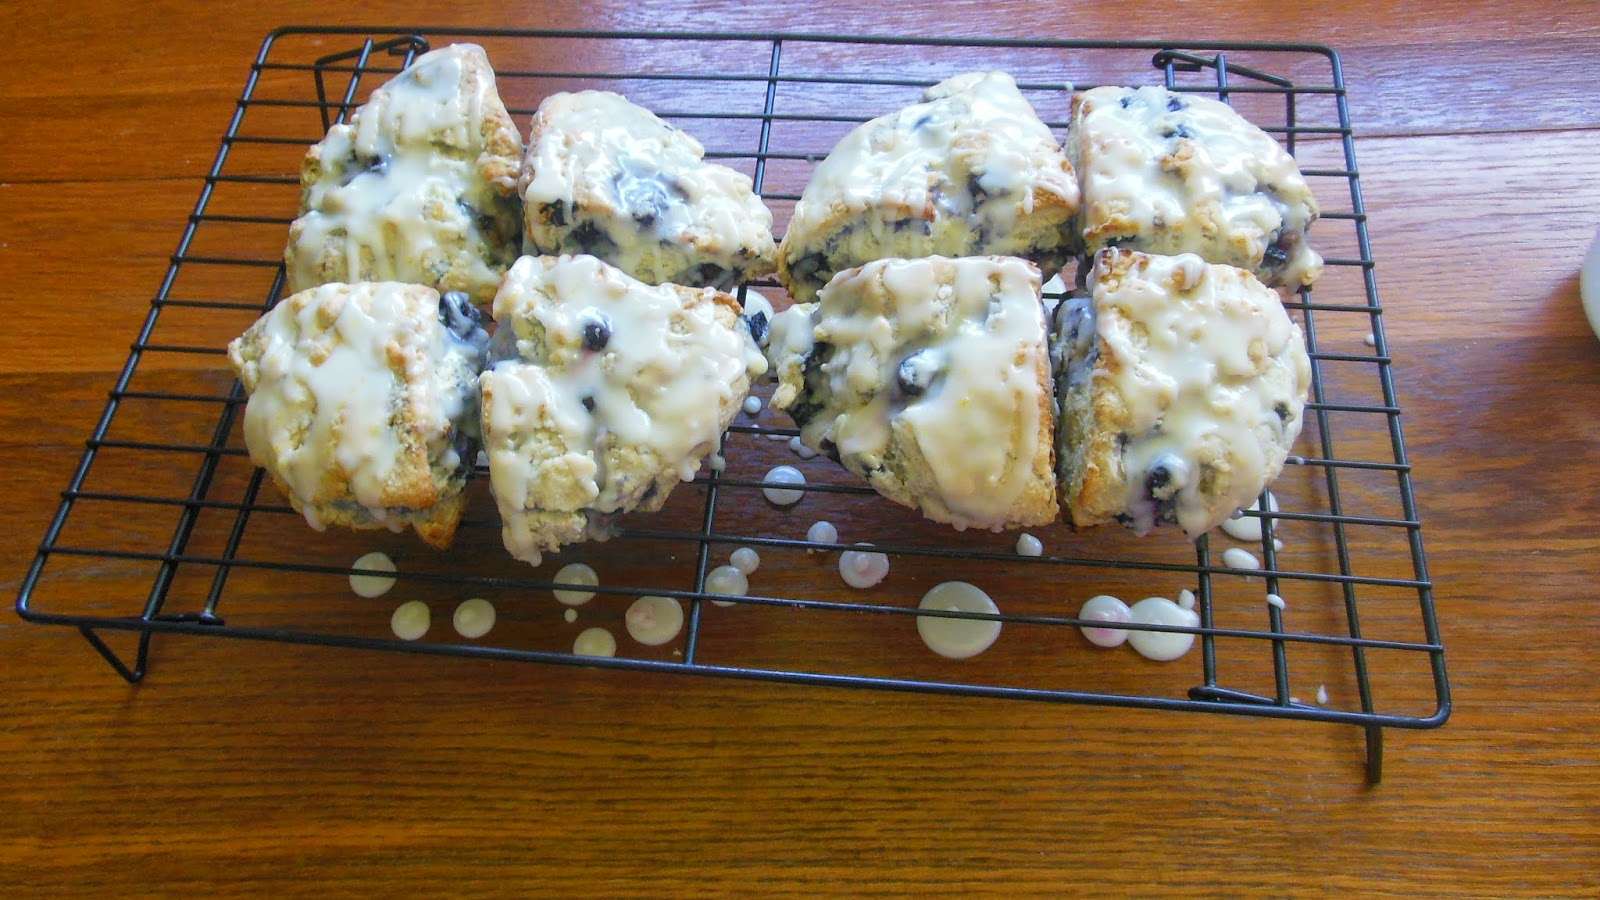
Ever wonder what summer sunshine tastes like? I'm pretty certain it involves blueberries and lemons. Anyways, after being hit by a craving for something involving blueberries and lemons, I decided to make Blueberry Lemon Scones. Enjoy!

Blueberry Lemon Scones


Ingredients

1 box (18 oz) Original Fisher Fair Scone Mix (I got a big box that had 18 oz packets at Costco)
 3/4 cup milk
1 lemon
1 cup blueberries (I used frozen but I am sure fresh would work too)
2 teaspoons butter
1 1/4 cup powdered sugar

Directions

Zest your lemon then squeeze all the juice you can from it (my lemon was small so I had to use extra bottled lemon juice I keep on hand).


Combine about 1 tablespoon of lemon juice with your milk and set aside. Empty your scone mix into a bowl and add half of the lemon zest. Mix it up so the zest isn't in clumps. Add your blueberries to your scone-zest mix and toss it up so the blueberries are evenly distributed.


Add your milk-lemon juice mix (it should be a little lumpy) to your scone mix and stir it all together. It will be pretty sticky.

Divide the dough into two equal parts and pat them into domes about 7 inches in diameter.


Using a sharp knife, cut the domes into quarters then scrape them off the counter and put them on a greased pan (can you tell my pans are really old and very well loved?).


Bake at 425 degrees for 13-15 minutes. (When they come out of the oven be sure to remove them from the pan immediately so the bottoms don't get any darker!)


As your scones are baking, take your remaining zest and mix it with 2 Tablespoons of the remaining lemon juice and 2 teaspoons of butter.


Microwave the juice-zest-butter for a few seconds (just until the butter is melted--I put mine in my crappy little microwave for 30 seconds). To your warmed juice-zest-butter, add the powdered sugar (for thicker or thinner glaze add another 1/4 cup powder sugar or decrease powder sugar by 1/4 cup, respectively) mix it all up and set it aside.


After the scones come out and you put them onto a cooling rack, let them cool for 10 minutes then glaze them (I HIGHLY recommend you put the baking sheet back under the cooling rack to catch the extra glaze that drips off. It will be MUCH easier to clean up). Serve after 10 more minutes of cooling or store them in an air tight container after they have cooled completely (about an hour).


Yum!

Love from the wet side,
Mrs. Mommystars

Thursday, June 5, 2014

"When the spice flow stops, all eyes will turn to Arrakis." -Muad'Dib, Dune 1984

So I have been having a hard time getting veggies down my 19 month old little monster's throat. I have tried everything I can think of to get veggies down him. So far, the only thing that is working is the magic of hiding them in things I know he likes. Enter in this God-sent recipe. :) It was originally a Paula Deen recipe but I adjusted her recipe for healthier choices and combinations of flours, sugars, and spices. I love Paula's Southern Cooking Bible but, lets be honest, 99.9% of her recipes need a bit of cleaning up in the heath department--hence my modifications. Enjoy!

Spiced Zucchini Muffins

2 cups shredded zucchini (the food processor is my best friend with this)
1 1/2 cups maple syrup (or 1/2 cup honey if that's what you'd rather use)
1 cup vegetable oil (I use Canola oil)
4 eggs
2 teaspoons real vanilla extract
1 1/2 cups all-purpose flour
1 3/4 cups whole wheat flour
1/2 cup flax meal
2 teaspoons cinnamon
1 teaspoon nutmeg
1 1/2 teaspoons salt
1 teaspoon baking powder
1 3/8 teaspoon baking soda

Mix wet ingredients (the first 5) together. Mix/sift dry ingredients together. Combine the wet and dry ingredients. Using a 1/4 cup scoop batter into muffin tin. Bake muffins for 25 minutes at 325 degrees or until toothpick comes out clean. Makes 2 dozen plus 1 daddy-size muffins.


Paula Deen suggests serving her version of the recipe with an herb cream cheese. Personally, I have never bothered making that but the sweet, savory, spicy combination intrigues me. I will have to try that this summer when I can get my hands on some reasonably priced fresh herbs.

While these were baking I saw some oranges in my fruit bowl. Next time, I think I will add the zest of an orange. I think that would make these smell even more heavenly and complement the spices nicely. I'll let you know how it goes!

If you are looking to swap granulated sugar for something a little healthier in a recipe, like I did for this one, I found this infographic very helpful.

Love from the wet side (of Washington this time!!! We are so happy to be back home but miss all the good friends we made down in Portland),
Mrs. Mommystars

Wednesday, February 12, 2014

Vampires and Mushrooms


This week I saw some beautiful—and large!—Portobello mushrooms. I couldn’t pass them up! I love mushrooms and have been trying to think of various ways to incorporate them into our diet more often. Since Washington is known for its vampires—I am, of course, referring to the lack of sunlight and not a certain teen vampire book/movie that was all the rage a few years ago—I am convinced that God put mushrooms (dark/shade loving organisms that happen to be high in vitamin D) here for a reason (a place know for its lack of access to vitamin D producing sunlight). What better way to enjoy such beautiful large Portobello mushrooms than in burger form? And ya know what? They turned out great! Mr. Legendary even approved! Hope you enjoy them too!

Oven Baked Portobello Mushroom Burger

Ingredients (for 2 servings)
2 Portobello mushrooms
2 rolls or hamburger buns
1 tomato
2 leaves of lettuce
2 slices of provolone
1 or 2 tablespoons of basil pesto
1 teaspoon Worcestershire sauce
1 teaspoon balsamic vinegar
1 teaspoon olive oil

Instructions
Heat oven to 450 degrees. Remove stems of the mushrooms and place the caps frill side down on a cookie sheet. Bake them for 10 minutes. While the caps are in the oven, mix the pesto, Worcestershire, balsamic vinegar, and olive oil together. After the timer goes off, remove the caps from the oven. Flip them over (use a fork or spatula so you cont burn yourself!) and spoon half the pesto mix on to each cap. Place a slice of cheese on each seasoned mushroom cap then return them to the oven for 5 more minutes. After the 5 minutes, remove the mushrooms and let them sit for another 5 minutes. Place warm caps on hamburger buns or rolls and top with lettuce and tomato. Enjoy!

If you didn’t follow my recipe exactly, I’d love to hear what modifications you tried!
Love from the wet side, 
Mrs. Mommystars

Monday, April 8, 2013

We are in the stickiest situation since Sticky the Stick Insect got stuck on a sticky bun. -Rowan Atkinson

Mmm... Thai sticky rice. Mr. Legendary and I just love the stuff. Forget the rest of the menu, I'll just have the sticky rice with peanut sauce whenever we go to a Thai restaurant. I'd eat the stuff every day if I could go to a Thai restaurant on a daily basis. But, since money doesn't grow on any of the trees in my yard (or apartment complex), I will just have to pine away until our budget allows us to eat out again.

Unless....

I make the stuff at home! Yep! That's right! I can now make restaurant style Thai Sticky Rice with Peanut Sauce right here in my kitchen to enjoy every day I feel like. After trolling the internet looking for how they make their rice in those little baggies--and not finding a thing!-- I decided to figure it out on my own. So how can you enjoy the exotic goodness in your kitchen? Here is how:

Thai Sticky Rice with Peanut Sauce--Restaurant Style!

Ingredients (for one serving)
1/4 cup sweet rice (also called glutinous rice, it is very important to use the correct kind of rice!)
water
(for my simple Peanut Sauce*)
1 tablespoon crunchy peanut butter (we like Skippy)
1 tablespoon sweet teriyaki sauce (we prefer Mr. Yoshida's)
1 tablespoon coconut milk
Saracha Sauce

Instructions
Step 1. Soak the rice for at least 3 hours in warm water. It is best if soaked over night but in a pinch at least 3 hours in warm water will do. DO NOT SKIP THIS STEP.

Step 2. Drain rice.

Step 3. Put soaked rice in little plastic baggy with 1 tablespoon of water.


Step 4. Bring water to a soft boil** over medium heat and place either bamboo steamer or dollar store grease splatter screen over pan.

Step 5. Put baggie of rice on steaming surface and pat the rice around so its evenly distributed around the baggy.

Step 6. Cover baggy of rice and cook for 10 minutes.

Step 7. After 10 minutes, flip the baggy of rice over and cook 10 more minutes. (Like a pancake.)


Step 8. Make your peanut sauce by mixing peanut butter, teriyaki sauce, and coconut milk together. Add Seracha sauce until its as spicy as you like. (I used about 1/2 teaspoon for a mild-medium spice.)


Step 9. Remove rice baggy from steamer and let cool. See how the rice looks slightly translucent? That means its fully cooked and ready to eat! If your rice is still raw white-ish looking, it isn't done and will be crunchy if you don't cook it longer.

Step 10. Empty baggy onto plate and serve with peanut sauce. YUM!!!


*There are lots of different recipes for peanut sauce. So far, this is the one we like best. I think it has the optimal balance of salty, sweet, and spicy.

** It is very important to make sure your water is not at a hard boil because the poor little baggy cannot withstand that kind of harsh treatment. It is a gently soul and will melt if over heated!


Love from the wet side,
Mrs. Mommystars

Wednesday, February 20, 2013

Beer for Breakfast!


It has been far too long since I have blogged. This recipe is not only totally blog worthy but I can’t help myself from sharing its awesomeness with the world. You’re welcome. :)

Amazing Guinness Pancakes
3 cups flour (I used 1 cup whole wheat and 2 cups all-purpose but you could use any combination you feel like)
2 t baking powder
1 t salt
1/8 - 1/4 t nutmeg (A popular northern European spice. I suppose you could try cinnamon if you like.)
1 cup sugar
2 T molasses (I didn't have dark brown sugar on hand. If you have it just use a cup of that and don’t add the molasses)
1/4 cup canola oil (You could use melted butter but that takes effort)
1 t vanilla extract
2 eggs
~1 pint Guinness beer* (I don't know the exact amount. I just added it until the batter was a little thicker than cake batter since I prefer a thicker pancake.)
Directions: 1/4-1/3 cup batter on a hot pan and let it do its pancake-thing with only a flip of assistance from you. I’d finish my instructions with a classic “enjoy” but I know you are already doing that… ;)

*Any leftover Guinness can be either a) chef's perk--drink up me hearty!--or b) poured over a hunk of pork in a crock-pot (along with a dash or two of Worcestershire sauce, a clove of garlic, and a squirt of Dijon mustard) for some spectacular pulled pork. 

Here is a link to a blog where I got the main parts of this recipe. He suggests serving them with Baileys Butter and Whiskey Syrup (you can find the recipes in the blog) for Irish Car Bomb Pancakes.

Love from the wet side,
Mrs. Mommystars

P.S. Watch this video. Because it is awesome.

Monday, January 23, 2012

"Gromit, that's it! Cheese! We'll go somewhere where there's cheese!" -Wallace, A Grand Day Out (1989)


For those of you who have no idea where the quote I used for the title of this blog came from, the following link is for you.

And for those of you who would like to watch it for the first time or again, this one is for you! ;)

Today’s project started last Tuesday, when I got the mail. I received the usual advertisements and, not wanting to pass up saving a few cents, I dutifully looked through the coupons and found one for Reynolds new wrap that has foil on one side and parchment paper on the other. It suggested the best use for their new product was baking dish lining and generously included a recipe for lasagna. Mmm lasagna… I tossed the ad in the “clip” pile to cut out the recipe so I could try it at some point. The lasagna was forgotten until the next day when Jason and I had agreed to have a “family meeting” and talk about our “family values”—incidentally, we didn’t get very far in developing our family values because we both got very distracted talking about self-sufficiency and how totally dependent we are on the grocery store and working power lines. 

Jason and I have been talking about self-sufficiency for years. College obviously wasn’t exactly the ideal place to work on trying to make things yourself, instead of buying them, since half of one’s time is taken up slaving over homework and the other half is taken up trying to forget about the torture of said homework. But Jason and I still wished we could make things ourselves, hence our small collection of books on the subject.

While we were talking about self-sufficiency, I was flipping through Homesteading and came across the recipe for ricotta cheese on page 178. And so begins the following cheese adventure…

Part 1 of My Cheese Adventure

Ricotta Cheese
Equipment
  • Large pot with lid
  • Spoon
  • Colander
  • Cheese cloth
  • Thermometer
  • Measuring cups and spoons (not in photo)
Ingredients
  • 1 gal milk (I used 2%)
  • 1/3 cup plus 1 tsp white vinegar
  • ¼ tsp salt
Instructions
    Step 1: Pour milk into pot.

    Step 2: Add ¼ tsp salt.


    Step 3: Heat slowly until temperature reaches 180 degrees F. Stir constantly! It took me 25 minutes to heat my milk at level 6 on my electric stove.


    Step 4: Remove from heat.

    Step 5: Add vinegar and stir for 1 minute. You should see curds begin to form.


    Step 6: Cover and let it sit undisturbed for 2 hours.


    Step 7: Pour into a cheesecloth lined colander and let curds drain for 2 hours. I found that the colander I was using wasn’t letting all the whey through, so I got creative. 


    Step 8: Enjoy! The recipe says that it keeps for a week in a sealed container in the fridge but since I used mine later that day I can’t verify that.


    Wohoo! Ricotta cheese for my homemade lasagna! I just wish I wasn’t cheating with the box of noodles, cans of sauce, bag of pre-shredded  mozzarella, and plastic tube of ground turkey. Someday, I will be able to say, “I made and grew this whole thing from scratch” but today is not that day.

    But now the age old question: what do I do with all the whey?


    Simple solution: make more cheese!!!

    I read up online there are loads of things you can do with whey. Here are some good ones: use it in place of milk, broth, or water when you make biscuits, bread, smoothies, potatoes au gratin, and boiled rice.

    I, however, chose to make a Norwegian classic—brunost. Translated it means brown cheese and is made by reducing whey, processing it, and removing excess liquid until desired texture is reached, and cooling the cheese quickly in an ice bath. It is usually referred to as gjetost (pronounced “yet-hos”) because its make with goat milk whey. I only used cow’s milk so my cheese is just brunost.

    Since there wasn’t a recipe in the homesteading book I used to help me make the ricotta, I had to go looking for one online. I ended up combining the instructions of these two sites. 


    Part 2 of My Cheese Adventure
    Brunost
    Equipment
    • Large pot
    • Small pot (optional)
    • Spoon
    • Spatula
    • Whisk
    • Food processor
    • Bowl of cold water (for ice bath)
    • Ice (for ice bath)
    Ingredients

    • Whey
    Instructions

    Step 1: Heat whey to boiling. Be careful of over boil. It won’t hurt the cheese but it makes a mess! You can see my evidence of spillage.


    Step 2: Reduce to medium heat and simmer stirring occasionally.

    Step 3: When reduced to ¼ of original amount begin stirring more frequently and watch texture closely. It took my batch about 1.5 hours to reduce that far.


    Step 4: When texture resembles very thin gravy or light corn syrup, put into food processor and process for 45 seconds.


    Step 5: Put smoothed whey into a small pot (or return to the large pot). I think it would have been easier for me if I had used a smaller pot for this stage.


    Step 6: Stirring constantly, reduce whey over low heat until desired texture is reached. The longer you heat the whey the firmer the cheese.


    Step 7: When desired texture is reached put pot in ice bath. Since I wanted a firm cheese I put my ball of cheese into a plastic baggie, instead of leaving it in the pot, and then I put it into the ice bath. I think I went a little too far with mine. I should have iced it when it looked more like the photo in the previous step.


    Step 8: Enjoy with crackers and fruit!


    Part 3 of My Cheese Adventure

    After finishing my brunost, I really wanted to try some but discovered that I had no crackers in the apartment. So, I made some crackers from scratch—which, by the way, were delicious!  

    Here is my early dinner snack. I had teriyaki turkey jerky, a pear, homemade crackers, and homemade brunost with a cup of Green Earl Gray tea lightly sweetened with honey.


    The brunost was very sharp. I also think that I cooked out too much water. Apparently, the stuff hardens more after you ice bath it… Oh well, lesson learned for next time. I don’t really know if there will be a next time though. I could only handle less than ¼ teaspoon on a cracker with half a slice of pear it was so strong tasting. I will have to wait for Jason’s review before I decided to throw it out though.

    Part 4 of My Cheese Adventure

    Before I made the lasagna, I had to try a crumble of the ricotta. It was excellent!!!  I definitely plan on doing that again! I was able to get about 3 cups of ricotta from the gallon of milk—fluffed up it was more like 4 cups.

    After destroying my kitchen to make the lasagna and cleaning it up for probably at least the third time today, my masterpiece is complete!


    And it was amazing.


    “I just hi-fived myself with the oven mitt!” –Mr. Daddystars (aka Jason)